Promoted Tile Links With Images
A SharePoint tutorial by Peter Kalmstrom
When you first create a SharePoint 2013 team site, it has
links in the shape of moving tiles on the start page. These
links are called promoted links, and you can create them
yourself and place them on any SharePoint page you wish.
In the demo below Peter Kalmstrom, CEO of kalmstrom.com
Business Solutions and Microsoft certified SharePoint specialist
and trainer, explains how to create your own promoted links.
After removing the default promoted links Peter creates
a new Promoted Links app for his own links, places that
app on a page and adds images to it.
Create a Promoted Links app
-
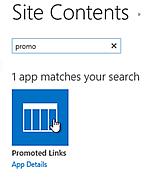
 Open the Site Contents and click on "add an app".
- Seach for "promo".
- Click on the Promoted Links app icon
- Give the app a name.
- Remove the app from the Quick Launch.
- Open the new app and go to the All Promoted Links
view.
- In edit mode, insert the anchor text and URLs for
your links.
- Click on Tiles and check that the promoted links
look ok.
Add the Promoted Links app to a page
- Open the SharePoint page where you want to place
the app in edit mode.
- Open the page where you want to place the image
link in Edit mode.
- Click on the App Part button under the Insert tab.
- Select the newly created Promoted Links app.
- Make any changes you want to do to the app part
before you save it.
Add images to the promoted links
Any image can be used. The size will be 150x150px, so if
you use a bigger image it will be compressed. Avoid using
a smaller image, as it will give bad quality.
- Save the images to the Site Assets library of your
SharePoint site.
- Open the Promoted Links app in edit mode and add
the image links.
|